Table of Contents
VisualApplets provides a graphical user interface for applet design that requires no programming or scripting. Its intuitive workflow enables users to create complex image processing designs without writing code. The tool is designed to be accessible to users without a programming background.
Additionally, VisualApplets also offers 'Command Line Options' and scripting options for the users that prefer to work with scripting or via the command line.
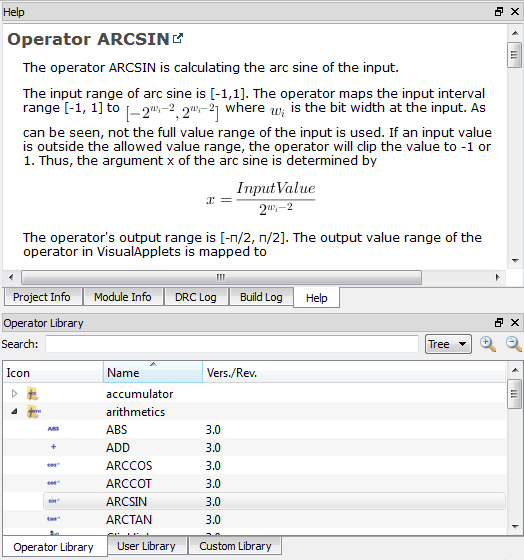
The VisualApplets main window consists of the following bars and panels:
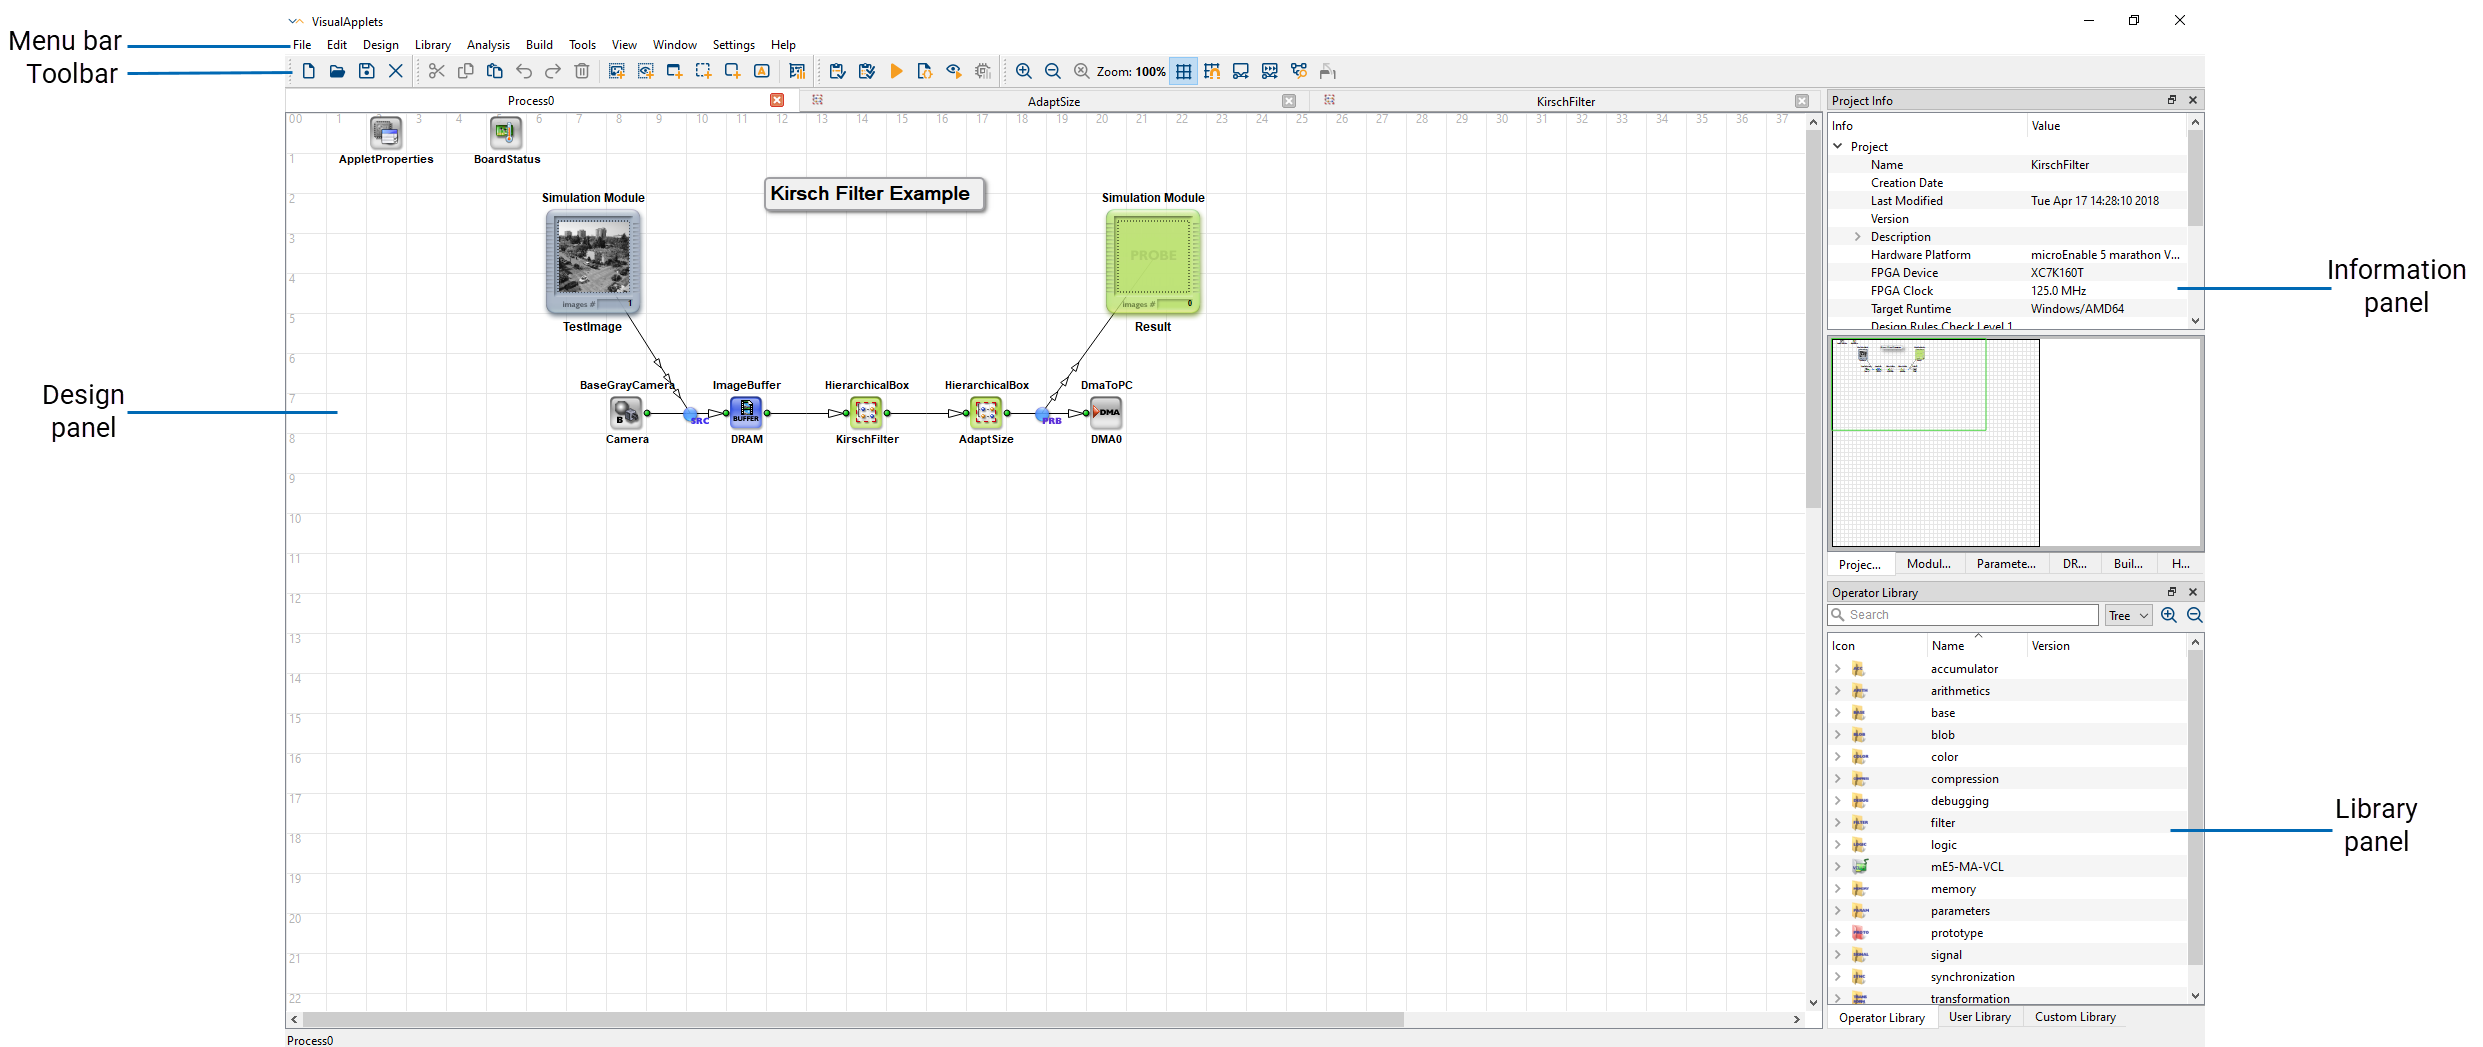
The main menu bar provides direct access to the program features. Use the toolbar buttons for quick access to important functions. You can change the size of the toolbar icons in → → :
Three panels provide different information and possibilities:
-
Design panel: The design panel shows your VisualApplets project. You always have one main design window, but, depending on the structure of your project, you may additionally work with several sub windows. In the menu, multiple views can be selected (Tile, Cascade, Tabbed View). Using the menu entries you find in → ( Ctrl+F8 ), you can easily select the design diagram window you want to work on at the moment.
-
Information panel: In default setting of the main program window, the information panel is always displayed. It offers different information windows in tabbed view:
-
Project Info
-
Module Info
-
Parameter Info
-
DRC Log
-
Build Log
-
Help
(For details on each information window, see below.)
-
-
Library panel: In default setting of the main program window, the library panel is always displayed. It offers three library windows in tabbed view:
-
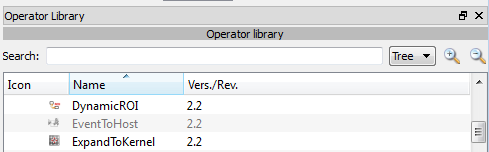
Operator Library: The Operator Library is a collection of sub-libraries that contain VisualApplets operators, i.e. the individual image processing functions.
-
User Library: The User Library can include custom libraries with user-defined combinations of operators (hierarchical boxes). For more information see 'User Libraries'.
-
Custom Library: To import operators into the Custom Library, see 'Custom Operator Libraries'.
-
![[Tip]](../common/images/admon/tip.png) |
Specific Operators |
|---|---|
|
Some operators displayed in the operator library may not be available for the platform you are currently designing for. Unsupported operators are grayed-out to indicate that they can't be used in the current design configuration. |
This topic provides information about the . The hosts the following views:

The Project Info window summarizes information on the current project.
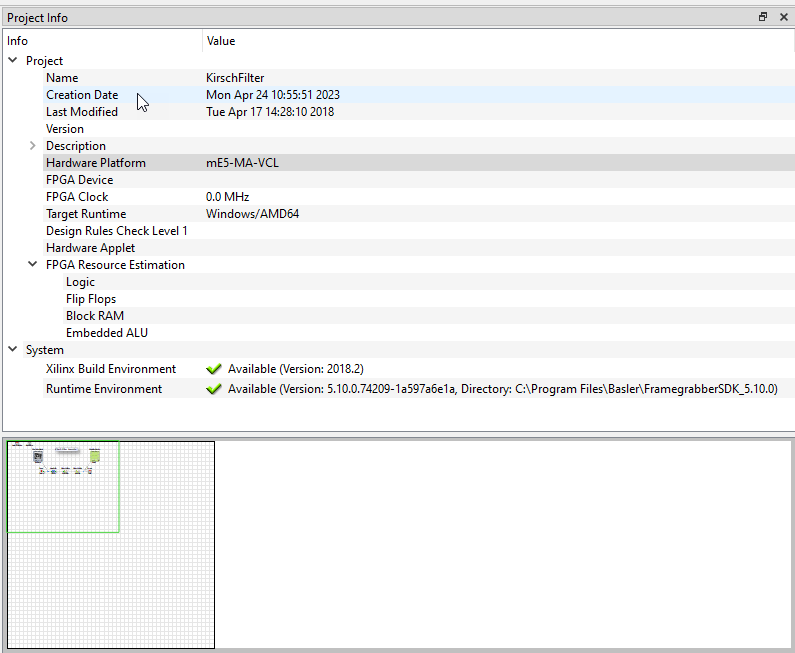
The following information is provided:
-
Name: Name of project (=file name)
-
Creation Date: Date of creation
-
Last Modified: Date of last modification
-
Version: Version number of the project; this entry can be edited from the → menu (see 'Project Properties')
-
Description: Verbal description of the project; this entry can be edited from the → menu (see 'Project Properties')
-
Type: Displays the FPGA type currently used on the target hardware (see 'Target Hardware Porting')
-
Target Runtime: Displays the target runtime (see 'Target Runtime')
-
Design Rules Check Level 1: Indicates found errors or successful performance (see 'Design Rules Check')
-
Hardware Applet: Indicates the existence of a hardware applet. The entry is checked if VisualApplets previously generated a HAP file of the project.
-
Resources: Shows the results of the resource estimation. See also 'FPGA Resource Estimation'.
-
System: Displays the found XILINX version, the available Framegrabber SDK version, and the Framegrabber SDK installation directory. This information is used by VisualApplets to build a HAP and for the final HAP output. See 'Build' for more information.
The Module Info window shows a list of all modules used in the project (as long as the input field of the window is empty). The list is structured by the hierarchy of the project.
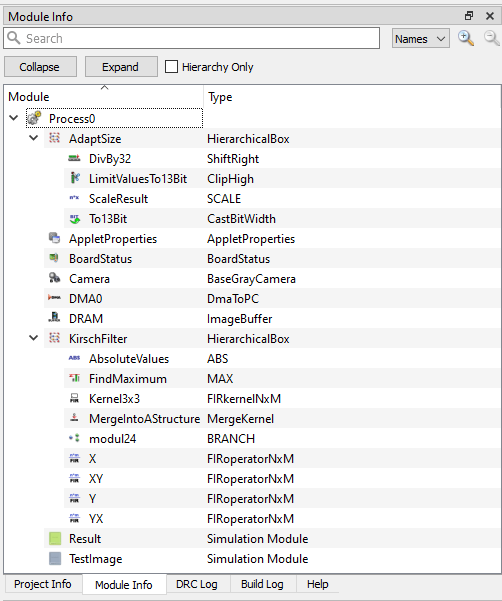
In the Module Info window, you can easily search for a certain module or
module type. This is very helpful when working in large designs. Before you start
your search, you should define the filter settings:
-
If you want to search for the individual name you gave to the module, activate "Names".
-
If you want to search for the module type (the name of the operator the instance of which you are currently searching for), activate "Types".
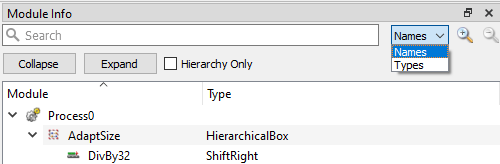
You can now enter your search term. It is sufficient to enter only part of a name. A click on one of the modules listed in the Module Info window will bring the respective design window into focus (in the design panel), with the module selected and highlighted.
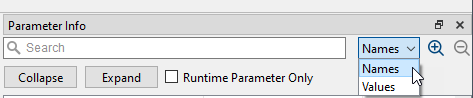
The Parameter Info view shows all parameters and their operators of the active design. You can also edit the parameters in the Parameter Info view.
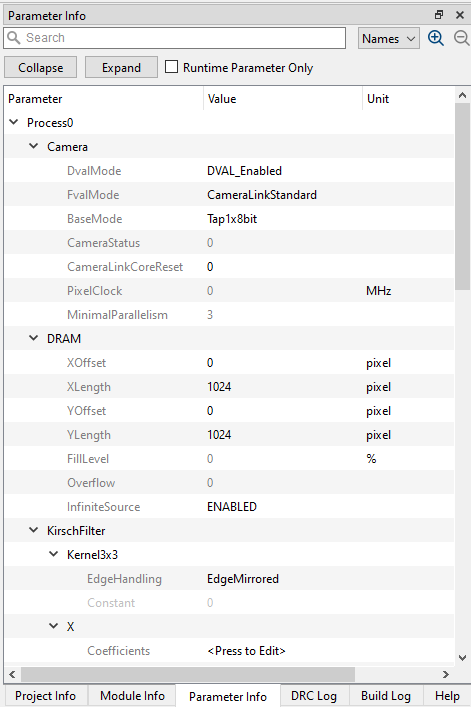
The Parameter Info view provides a search function that allows you to search for parameters, parameter values, or operator names. You can use the Runtime Parameter Only filter to display only the dynamical parameters, i.e. parameters that you can edit during runtime.
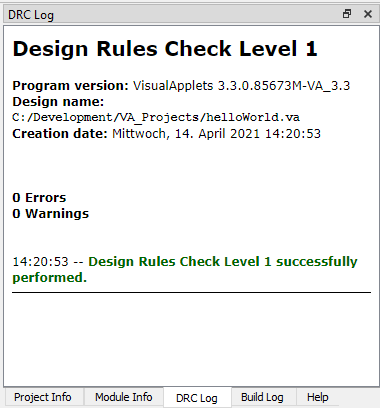
The DRC Log window displays the results of the last Design Rules Check. A click on one of the module names listed under a warning/error message will bring the respective design window into focus (in the design panel), with the module selected and highlighted.
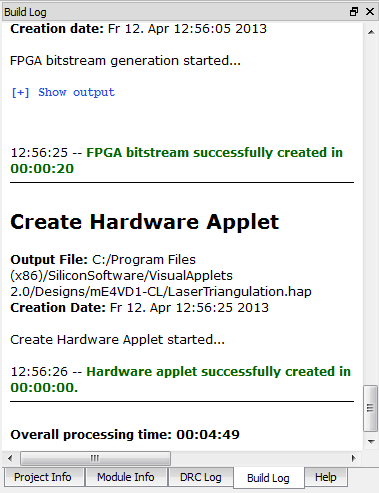
The Build Log window displays the results of the last Build.
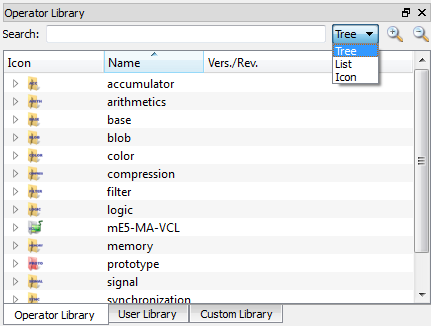
The Help window offers context-sensitive help on individual operators.
To open the context-sensitive help you can either:
-
Select the operator you want information on directly in you design and press F1 to open and display the corresponding information in the Help window.
-
Select a operator from the Operator Library window. The Help window will always show the help for the current selection.
If you press F1 in any other window or click on a help button, the context sensitive user manual help for the current selected window or function will open. Of course, you can access the operator help directly form this user documentation, too. See Operator Reference.
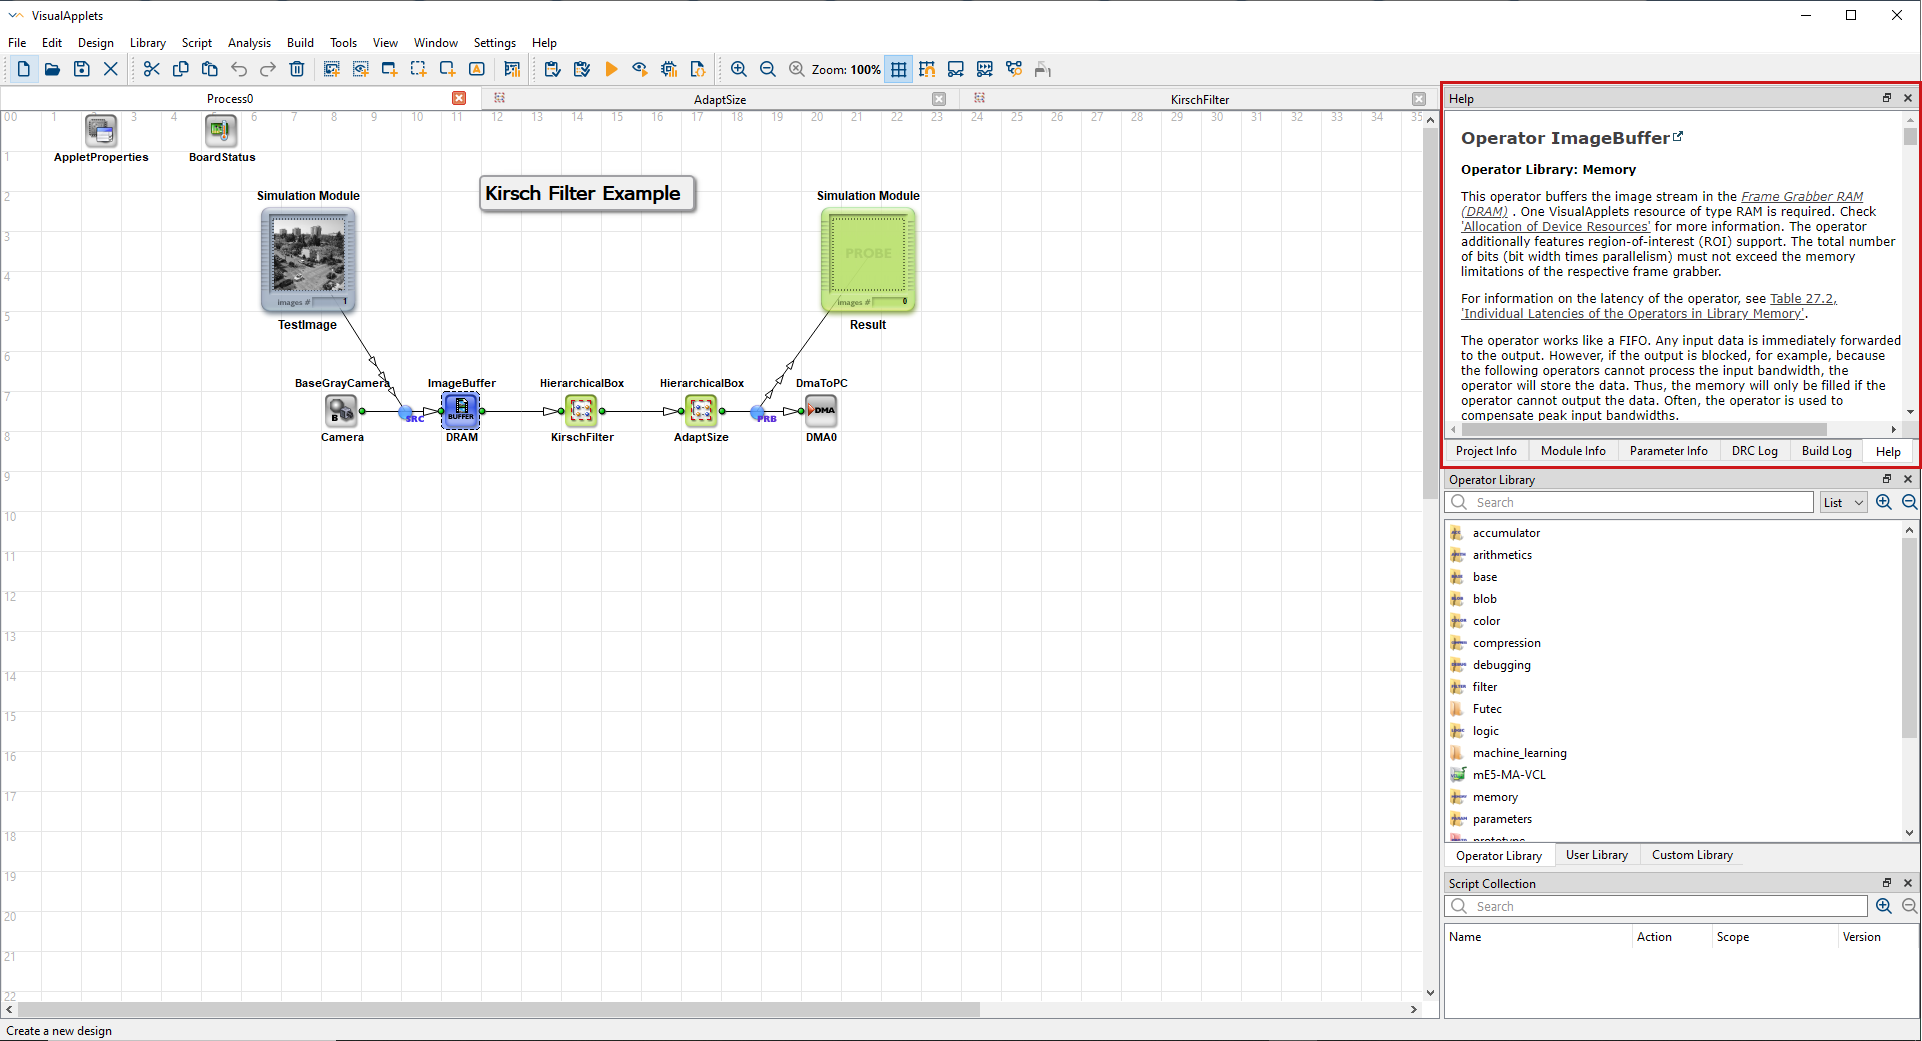
The library panel displays the Operator Library window, the User Library window and the Custom Library window in tabbed view.
All libraries (Operator Library, User Library, and Custom Library with all their sub-libraries) are organized in a tree structure. Each library contains operators.
The visualization of the structure can be changed by selecting either "Tree", "List", or "Icon" view.
In the search field, a search string can be entered to filter the list for
only the required operators. Camera for example will list all
operators containing camera in their name.
The Operator Library is a collection of sub-libraries that contain VisualApplets operators, i.e. the individual image processing functions.
You can get detailed information on each operator by clicking on the operator name in the Operator Library window and clicking on the Help tab in the information panel.
See 'Inserting Operators' on how to add new operators to a diagram. A detailed documentation of all operators is given in Operator Reference.
The User Library can include custom libraries with user-defined combinations of operators (hierarchical boxes). For more information see 'User Libraries'.
To import operators into the Custom Library, see 'Custom Operator Libraries'.
You have various options to adapt the main program window of VisualApplets to your personal preferences:
If you accidentally arranged the windows or toolbars in a way you didn't want to, you can restore the default setting by selecting → ( Ctrl+O ).
You can undock diagram tabs in the of the main window so that the design content appears in a floating window. With this feature you can edit a design using multiple screens. This feature can be accessed in three ways:
-
Via context menu:
-
Right-click on the tab.
-
Click .
-
-
Using the button:
-
Hover over the tab to reveal the button located to the left of the button.
-
Click the button.
-
-
Double left-click:
-
Double left-click on the tab.
-


The undocked diagram windows can be used and arranged freely like normal Windows windows.
![[Note]](../common/images/admon/note.png) |
Window State is not Saved |
|---|---|
|
When saving a design, the window state is not saved. Therefore, the design will be loaded without undocked windows. This also applies to the and functions that close undocked windows. |
To re-dock a floating window, there is a button in the toolbar of the undocked window. This button docks the diagram window to the last position of the active display area.

You can split the within the main window, which displays the diagram tabs side-by-side in the main window. This feature allows you to view and edit multiple diagram tabs simultaneously.
To split your :
-
Right-click on the diagram tab you want to move. A context menu opens up.
-
Select .

As a result, the diagram tabs are displayed side-by-side in the main window:

To end the split view, select in the context menu. This moves all diagram window tabs from the selected display area to the other display area.
|
Window State is not Saved |
|---|---|
|
When saving a design, the window state is not saved. Therefore, the design will be loaded without split views. This also applies to the and functions that close split views. |
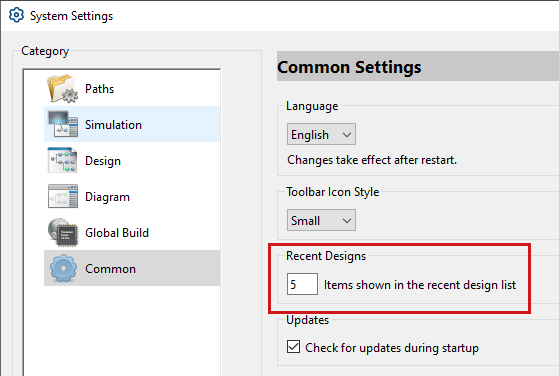
Under → VisualApplets offers you a list of recently opened VisualApplets files (*.va). You can configure the actual number of files displayed.
To define how many recently opened files are displayed:
-
Go to menu → and select category Common.
-
Under Recent designs, define the number of files you want to have displayed (up to 24).
-
Confirm with OK.
VisualApplets projects may include multiple processes. A process is the top level of a diagram and can include an arbitrary number of operators and hierarchical boxes. Each process can be started and stopped individually.
A good example where four processes are used, is a four camera application, for example the examples\Acquisition\BasicAcquisition\iF-CXP12-Q\QuadCXP12x1AreaGray8.va example. Have a look at
the following figure. It shows four processes with a camera, a buffer and a DMA operator in
each of the processes.

When the applet is used, all four processes, i.e., all four cameras can be started and stopped individually. If all four cameras are in the same process, they have to be started and stopped simultaneously, as all DMAs of a process have always to be started.
To learn more about the usage of VisualApplets applets on hardware, see section 'Running Your Applet on Hardware', and/or the Framegrabber SDK documentation.
To add a new process, click → or choose the icon in the Edit toolbar.
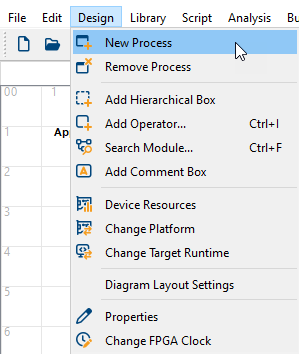
To remove a process first select any digram window belonging
to the process and afterwards select → or choose the icon in the Edit toolbar.
Processes always start with index 0 and have to be in ascending order. If a process is removed, processes with higher indices are shifted to fill the gap.
Below, you find a list of all shortcuts available in VisualApplets.
| Shortcut | Menu Item |
|---|---|
| Ctrl+N | → |
| Ctrl+O | → |
| Ctrl+S | → |
| Ctrl+P | → |
| Ctrl+Q | → |
| Ctrl+Z | → |
| Ctrl+Shift+Z | → |
| Ctrl+Z | → |
| Ctrl+X | → |
| Ctrl+C | → |
| Ctrl+V | → |
| Del | → |
| F2 | → |
| Ctrl+I | → |
| Mouse 3+ | → |
| Ctrl+F | → |
| F9 | → |
| Ctrl+F7 | → |
| Ctrl+F8 | → |
| F7 | → |
| F5 | → |
| F11 | → |
| Ctrl++ | → |
| Ctrl+- | → |
| Ctrl+Mouse wheel up | → |
| Ctrl+Mouse wheel down | → |
| Ctrl+Return | → |
| Backspace | → |
| Ctrl+Space | → |
| Ctrl+Arrow Right | → |
| Ctrl+Arrow Left | → |
| Drag+Drop |
Table 1. Shortcut List for Main Program Window
VisualApplets offers some command line arguments in order to use VisualApplets, for example, in batch scripts, or for linking the program into a system environment.
The syntax follows the following scheme:
<VISUALAPPLETSINSTALLDIR>\VisualApplets <-COMMAND> <ARGUMENTS>
The commands, together with the expected arguments, are listed in the following table:
| Command Line | Argument & Meaning |
|---|---|
|
-file |
Execute commands stored in a specified Tcl script. Arguments:
|
|
-compile |
Load a specified file and create an applet. The design will be checked against the design rules. Arguments:
|
|
-sdk |
Generates an SDK Example (C source code) for using the applet with the Framegrabber SDK. The design will be checked against the design rules. Arguments:
|
|
-KeepSyntheseTraceFiles |
Additional option when generating a hardware applet. Keeps the intermediate files (created during the build process) for tracing purposes after the build is completed. |
|
<VA file name> |
Load a specified VisualApplets design file. Used, for example, when assigning Arguments:
|
Table 3. Command Line Options and According Arguments
VisualApplets offers the possibility to print a diagram window or copy its content as an image into the system clipboard. The printing / screenshot is applied to the currently selected diagram window. The full window including all operators and links will be selected for output even if parts of the content cannot be fit into the current screen due to the limited resolution.
To start printing select the required diagram window and select → ( Ctrl+P ). The design will automatically be resized.
To generate a screenshot and copy the content into clipboard select the required diagram window and click on → . If you prefer to directly save the screenshot in an image file select → .
