pylon AI Platform#
It provides different machine vision projects for each AI vTool and also allows you to create your own projects. It supports all stages of model lifecycle management, from development to deployment, including model optimization for diverse hardware environments.
The AI Platform is available under the following URL: https://basler.ai. Simply sign up, create a Basler ID account, and get access.
仕組み#
As an introduction, the following sections provide some background information and explain key aspects of creating projects with the pylon AI Platform.
Concepts and Terminology#
Models: A model is an algorithm that can be trained using sample images. Based on the training, the model is then able to "predict" image content.
Architecture: The architecture of a model determines how a model works. Different architectures are available for different machine vision tasks.
Data sets: Data sets are a collection of data relevant to a specific problem or task. It contains all the visual properties related to the problem.
For instance, images of cats and dogs can form a data set for a classification model that distinguishes between cats and dogs. If the model needs to differentiate not only between cats and dogs but also mice, mouse image data must be added to the data set.
Typically, a data set is divided into three parts:
- Training data: Training data constitutes the largest portion of the data set used by a deep learning model for learning. The model adjusts its weights to recognize patterns within the training data.
- Validation data: Validation data is used by a DL model to assess its behavior during training. It remains independent of the training data and is not used for optimization.
- Test data: After training, the model's performance is evaluated using test data. Test data represents new, unseen examples and demonstrates how well the model generalizes to real-world data.
You can use the Recording feature of the pylon Viewer to create your own data sets.
Annotations/Labels: Annotations, also called labels, are added to the data set to inform the model about what is significant in the data. During training, the model uses this information to compare predictions with the expected/correct outcomes. For the classification task mentioned above, this information indicates whether an image depicts a dog or a cat.
To annotate images for use with pylon AI, you can either use an external training platform or use the open-source tool CVAT. This video demonstrates how to annotate images with bounding boxes for object detection using CVAT.
Training: In the context of deep learning, training is the process in which a neural network (a model) learns from the training data. The model makes a prediction for all training data (see "Data sets" above). The predictions are compared against the ground truth data (the annotation/label) in order to calculate the deviation. Based on the deviation, the weights of the model are adjusted in order to minimize the deviation. This process is repeated until the error has been reduced as much as possible. To verify that the model performs well, the model is used on validation data.
Inference: In the context of deep learning, inference means that a trained model is applied to new, unseen data and makes predictions about the content.
Using the pylon AI Platform#
This section takes you through the different steps of creating a machine vision project.
The pylon AI Platform is designed for intuitive use. After logging in to the pylon AI Platform, you see the Dashboard view.
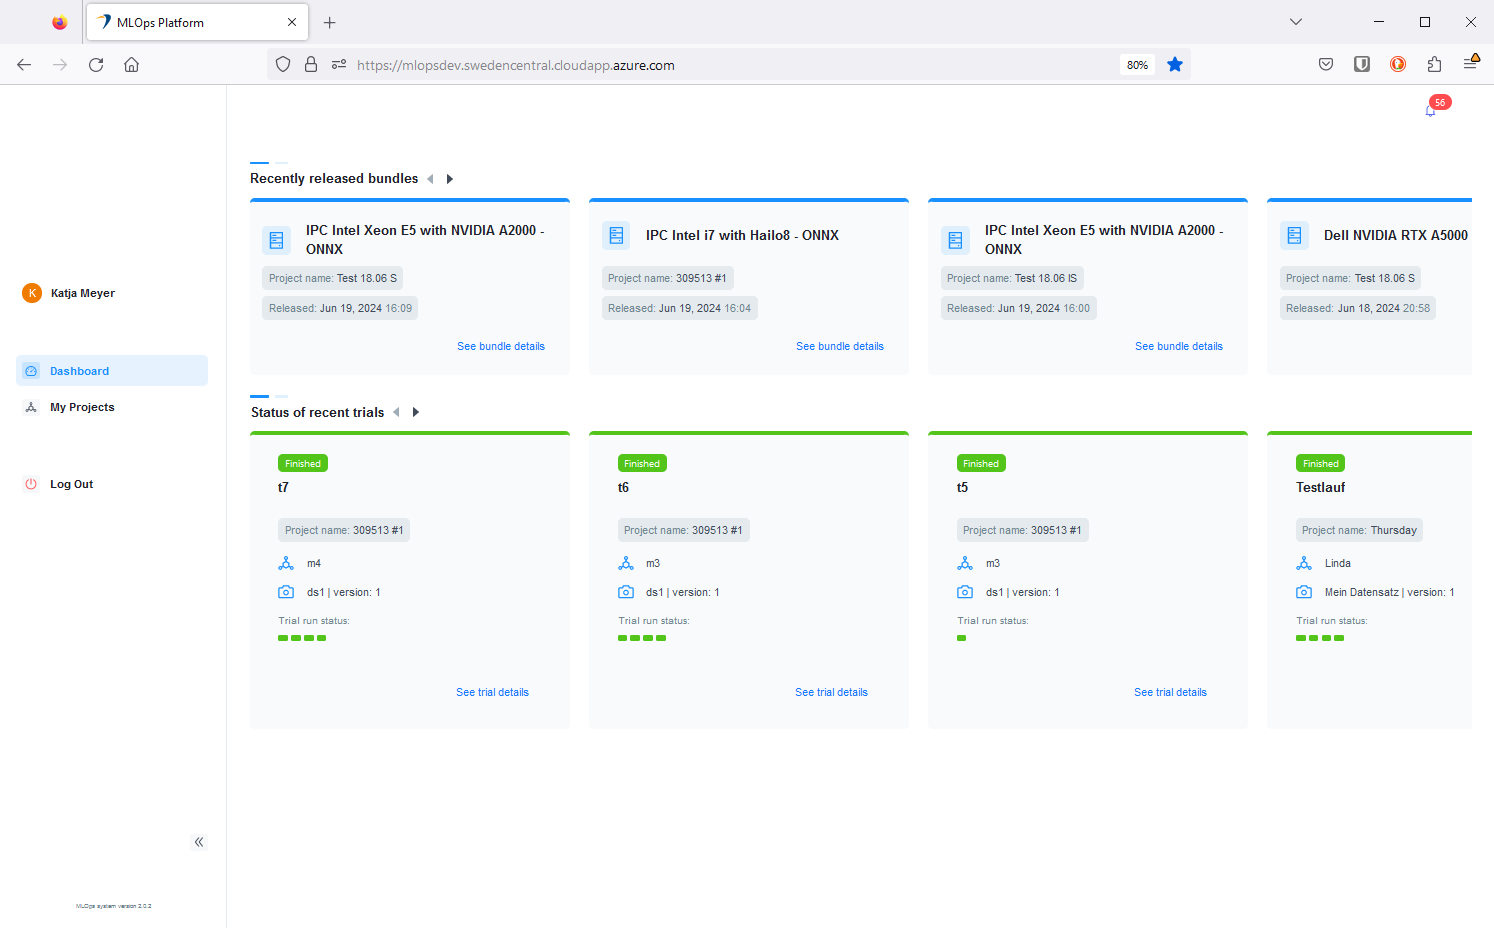
This shows the 5 most recently released bundles as well as the 5 most recently run trials.
To start creating projects, click My Projects in the navigation tree on the left-hand side.
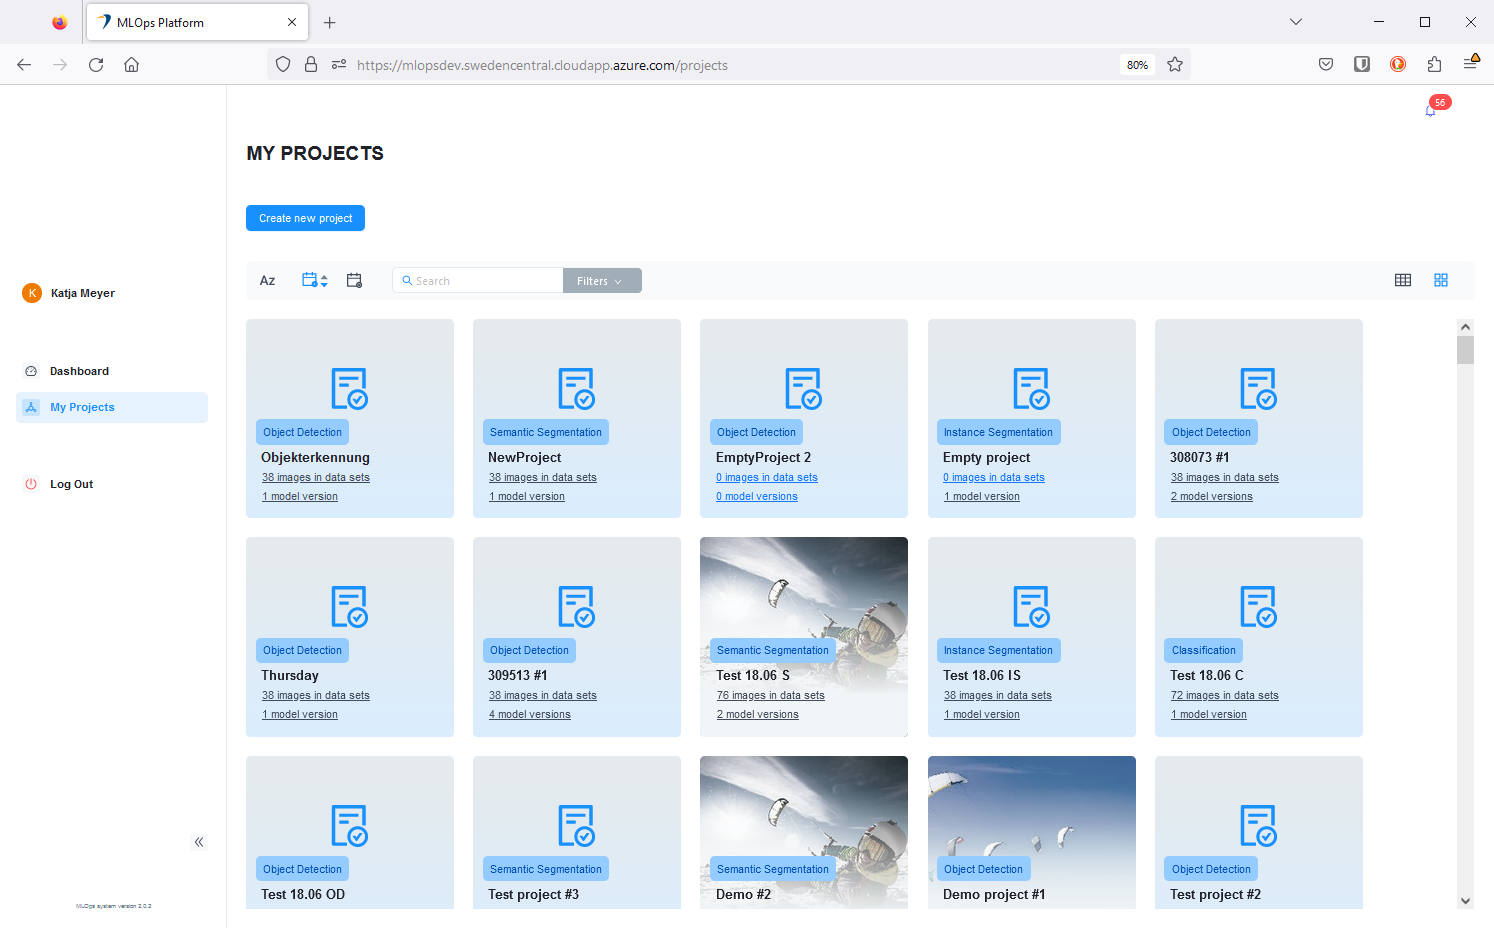
In the My Projects view, you see all projects that you, or other people who have access to the AI Platform, have created. You can choose to display projects in list view or tile view.
Project Creation#
You start by creating a project.
- Log in to the pylon AI Platform.
- Click My Projects in the navigation tree on the left-hand side.
- On the My Projects page, click Create new project.
- On the Create New Project page, specify the project type you want to create and enter a name and a short description (optional).
A project overview page opens.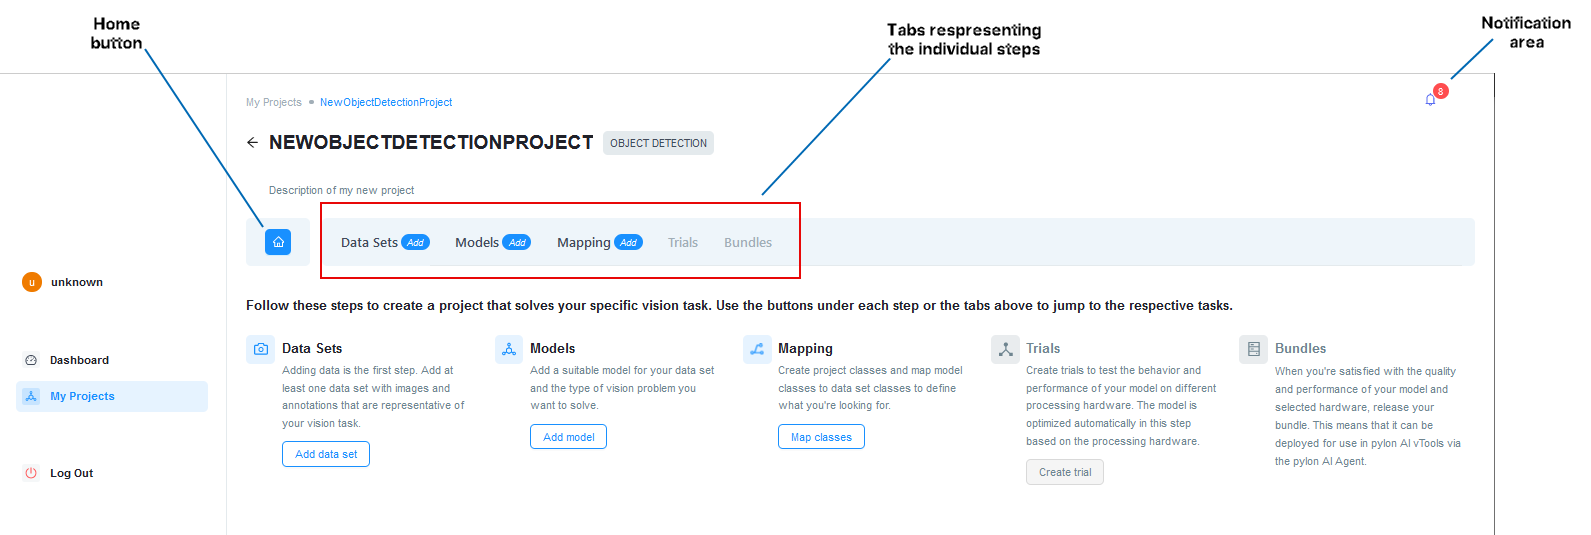
The tabbed navigation at the top shows you all steps that you can currently perform. Some steps only become available after you have completed the preceding steps.
In the notification area, a new message pops up for every action you perform on the AI Platform. All messages are saved until you choose to delete them.
The home button takes you back to the overview page of your project.
Data Sets#
-
Click the Add data set button or click Data Sets in the tab list above.
-
On the Add Data Set page, enter a name and a short description (optional) for the data set you want to add.
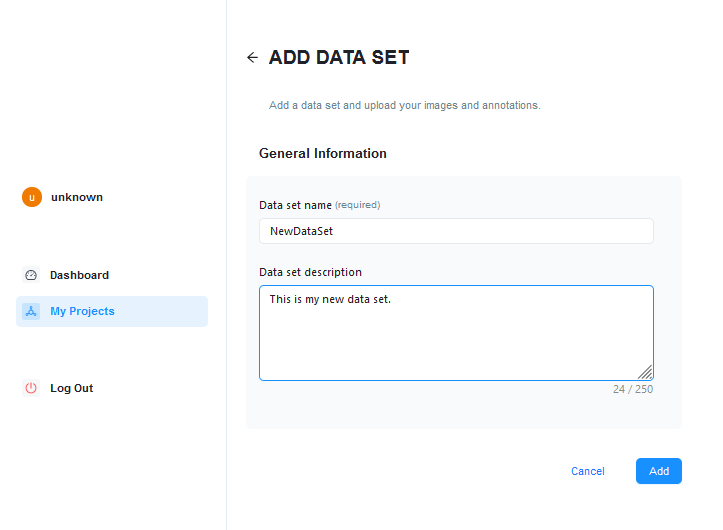
-
Click Add.
-
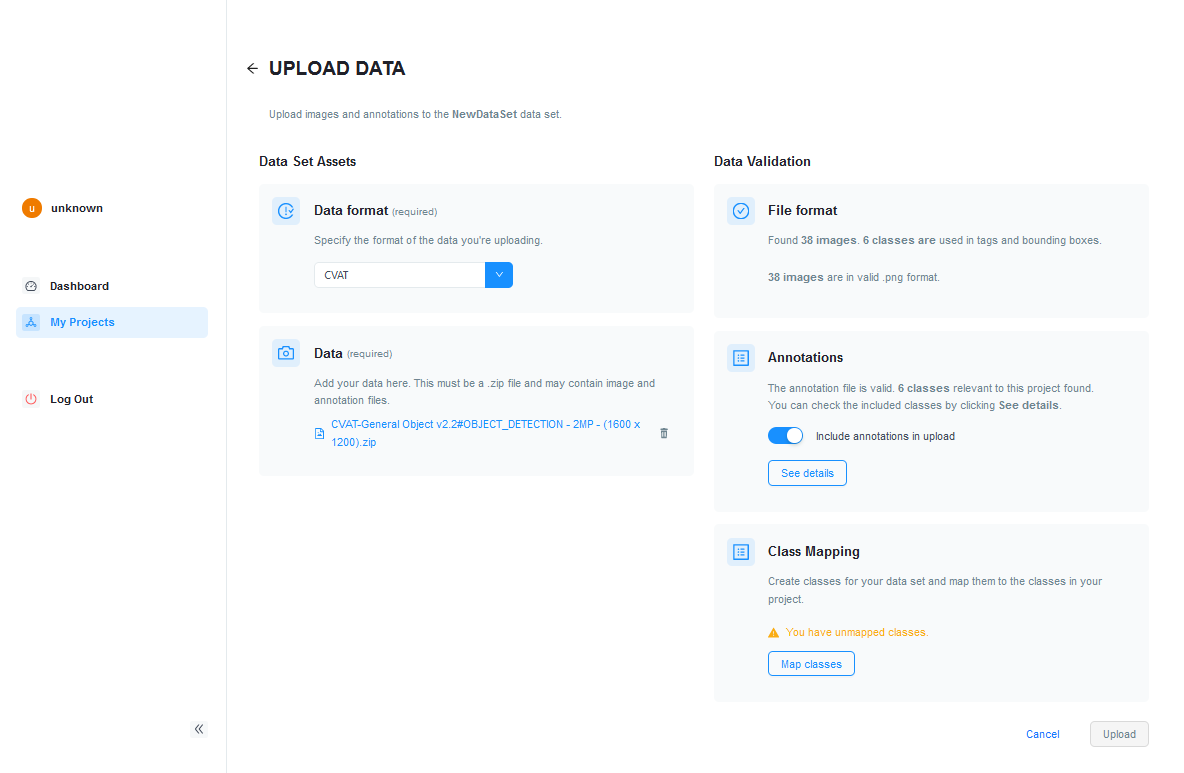
On the Upload Data page, specify the format of the data you're uploading and add the data.
情報
The data must be uploaded as a .zip file. The .zip file must contain image files and an annotation file.
Data validation starts immediately. Once the validation has finished successfully, you can check the annotations and continue with creating data set classes.
-
Click Map classes.
-
ペインの Class Mapping dialog, click Autocreate classes to automatically create data set classes based on the annotations in your images.
Alternatively, click Add new class in the drop-down lists under Data Set Class.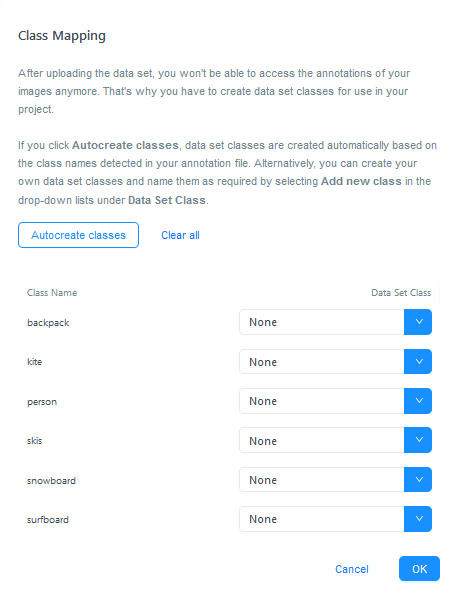
-
OKをクリックします。
-
On the Upload Data page, click Upload.
The Data Sets tab opens where you can see your data set. -
Click the data set to view its content, add images, and edit its properties. When you are happy with the state of the data set, click Publish.
You have to publish the data set to be able to use it in trials.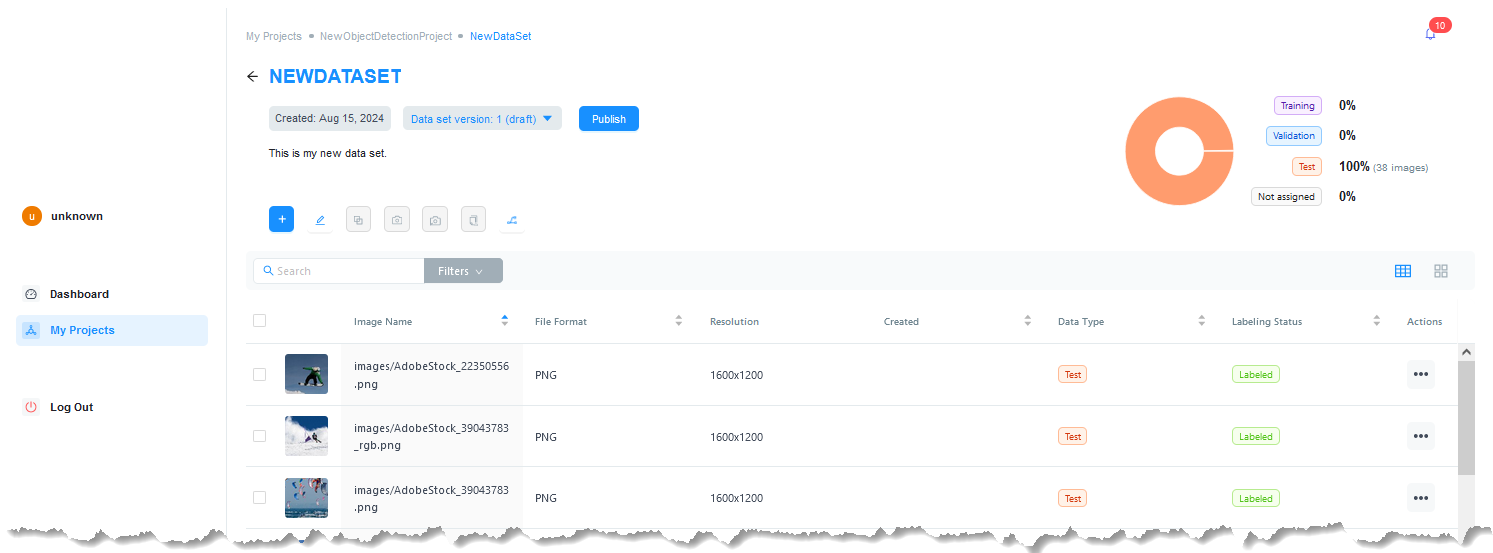
-
Go back to the Data Sets tab.
モデル#
-
Click the Models tab.
-
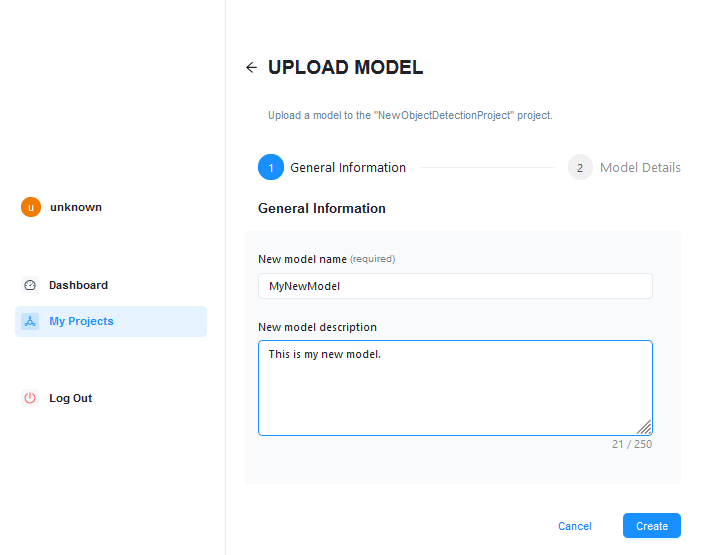
On the Models page, click Add model.
-
On the Upload Model page, enter a name and a short description (optional) for the model you want to add.
-
Click Create.
-
On the Upload Model page, specify the configuration of the model you want to upload and add the model file.
The upload and validation start immediately. When this has finished, you can check which classes your model contains.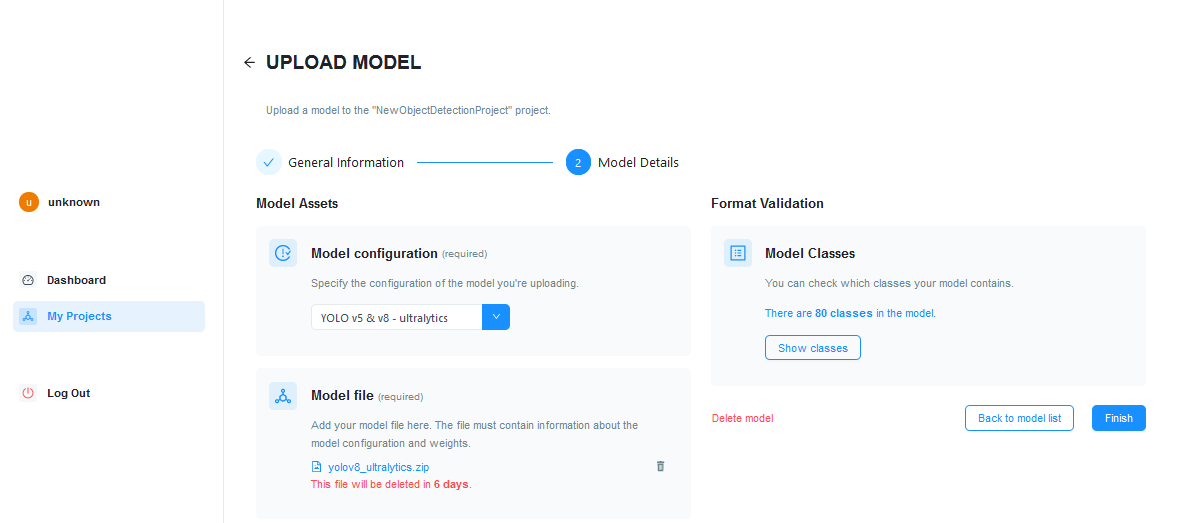
-
Click Finish.
The Models tab opens where you can see your model. -
Click the model to view its properties.

-
Go back to Models tab.
Mapping#
Data sets and models usually contain more classes than you need for a specific task. Mapping is the process of matching data set classes to model classes to define what you're looking for with your project. For this purpose, you have to add project classes and assign the desired data set and model classes to them.
-
Click the Mapping tab.
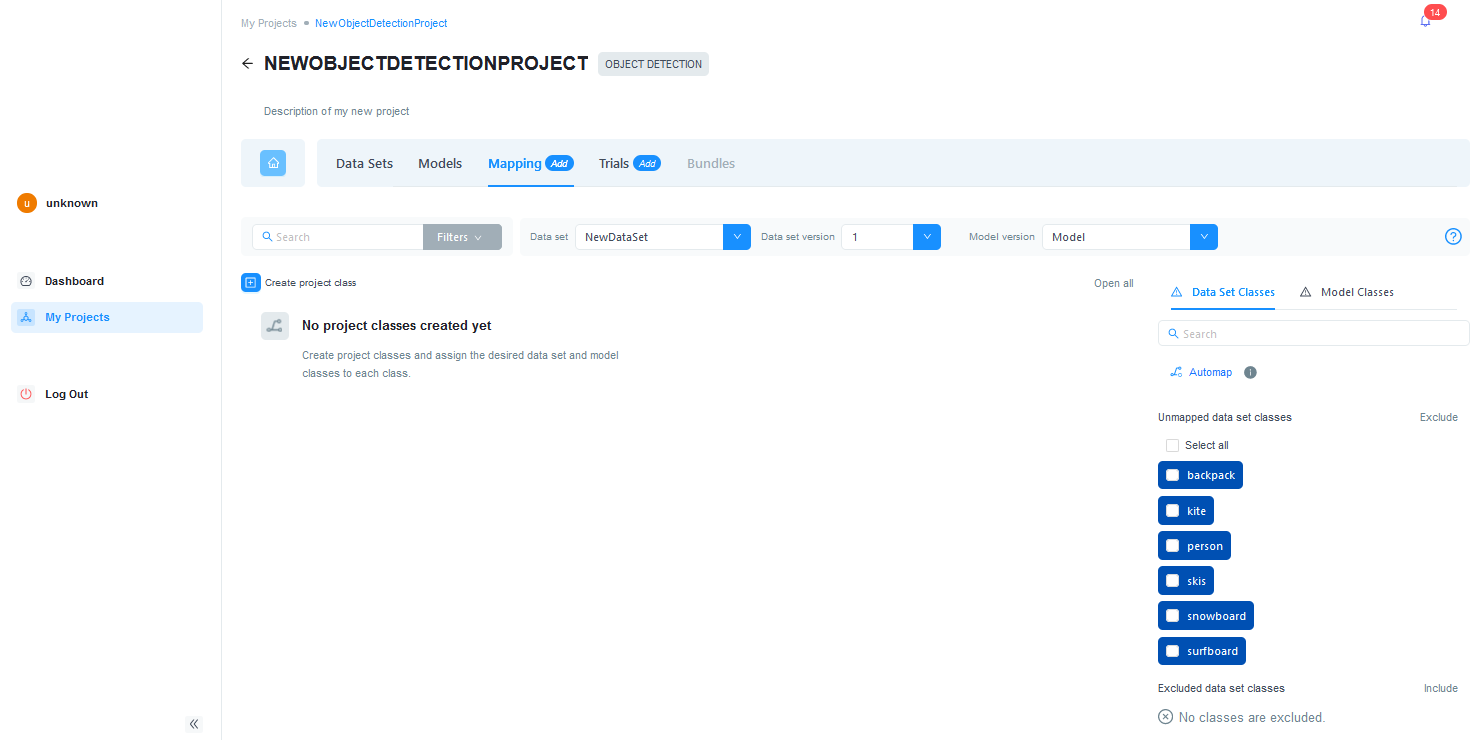
-
On the Mapping tab, click Create project class to create your first project class.
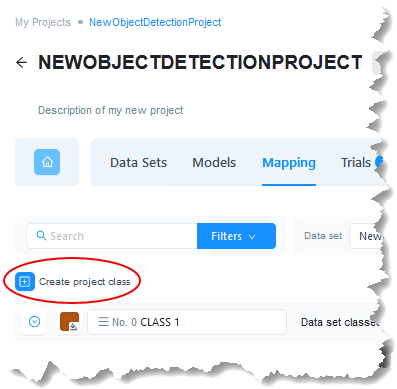
Alternatively, you can use the Automap feature.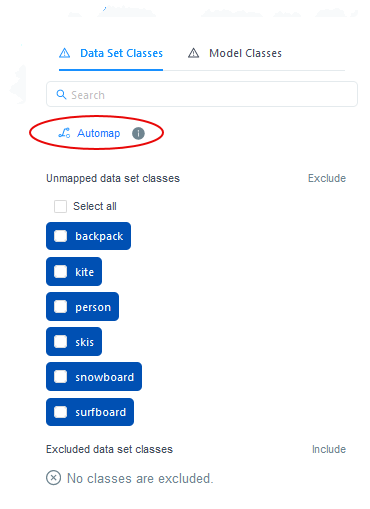
-
Change the default name to a different name if desired.
-
Add data set classes and model classes to it.
You can just drag and drop classes from the corresponding tabs on the right. Using the drop-down lists, you can change the data set or its version and the model version.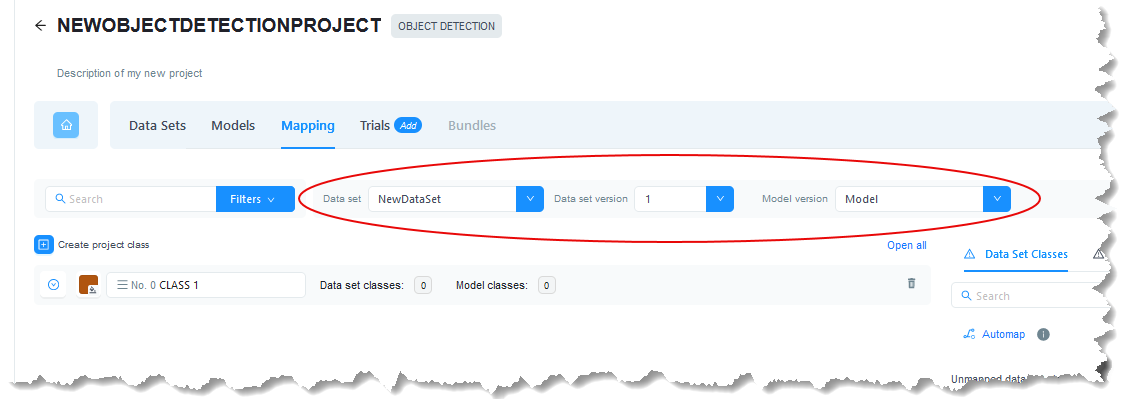
-
Repeat steps 2 to 4 until you have created all the project classes you need.
-
Exclude all data set and model classes that you don't need (see Excluding Classes for details).
Automapping#
Automapping allows you to map data set and model classes to project classes based on their names with one click. If no project class exists that matches the data set and model class names, a new project class with that name will be created. Therefore, if you have more data set classes or model classes than you want to use, make sure to exclude them before using automapping.
Automapping only works for unmapped classes. Any classes that have been mapped manually before, will remain in their classes.
If the names of data set or project classes contain the words "background" or "excluded", they will be excluded or defined as background depending on the project type.
Automapping is case-insensitive but the names of the classes have to be exactly identical.
To Use Automapping:
-
On the Data Set Classes tab on the right-hand side, exclude all data set classes that you don't need.
-
クリック Automap.
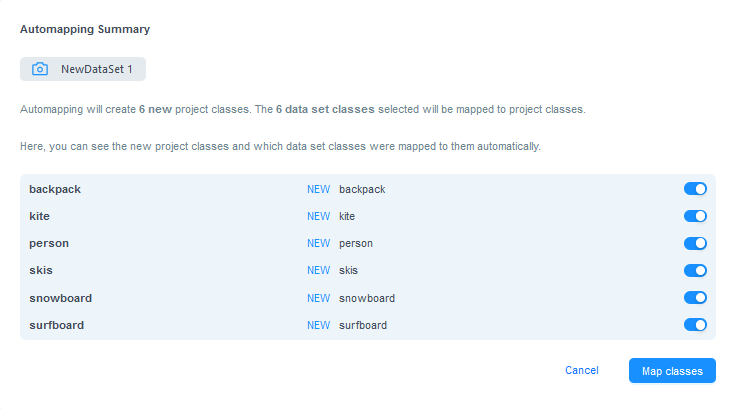
-
In the Automapping Summary dialog, check that you want to create all the project classes listed there.
You can deselect any classes you don't want. Deselected classes remain unmapped. Make sure to exclude them afterwards. -
Click Map classes.
Project classes are created and data set classes are added to them. -
On the Model Classes tab on the right-hand side, exclude all model classes that you don't need.
-
クリック Automap.
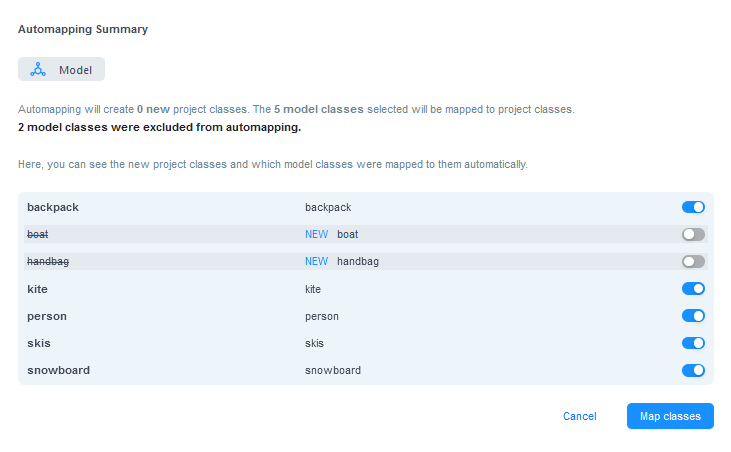
-
The Automapping Summary dialog shows existing project classes and which model classes will be mapped to them and any new project classes that will be created. Check that you want to create the project classes listed as new.
You can deselect any classes you don't want. Deselected classes remain unmapped. Make sure to exclude them afterwards. -
Click Map classes.
Project classes that don't exist yet are created. Model classes are added to new and existing project classes.
Excluding Classes#
Model classes that you don't want to use in a project have to be excluded to complete the mapping. This is necessary to get correct statistical data from your model.
To exclude classes, select all the model classes that are not required and click Exclude. Alternatively, you can drag the classes selected to the bottom of the screen and drop them in the Excluded section.
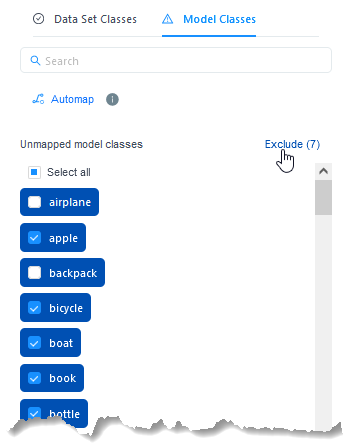
For segmentation projects, this is slightly different. Here, all superfluous model classes have to be defined as background. To do this, select all the model classes that are not required and click Define as background. Alternatively, you can drag the classes selected to the bottom of the screen and drop them in the Background section.
Both these actions can be reversed using the corresponding buttons or by dragging and dropping.
The excluded classes won't be considered when applying your project. This means that you won't get any results for them.
Trials#
-
Click the Trials tab.
-
On the Trials page, click Add trial.
-
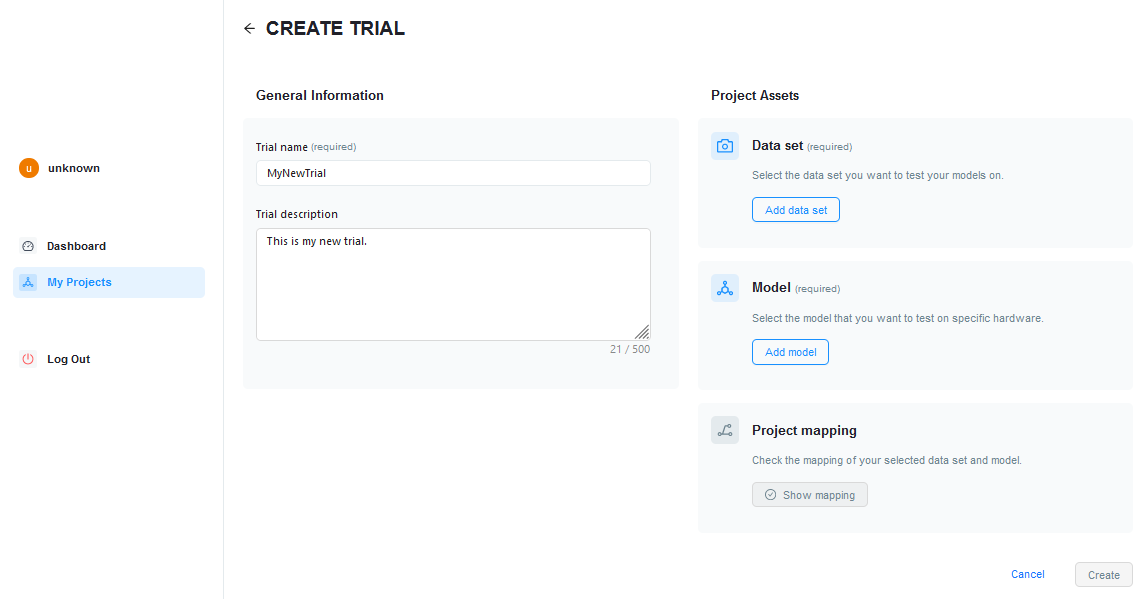
On the Create Trial page, enter a name and a short description (optional) for the trial you want to add.
-
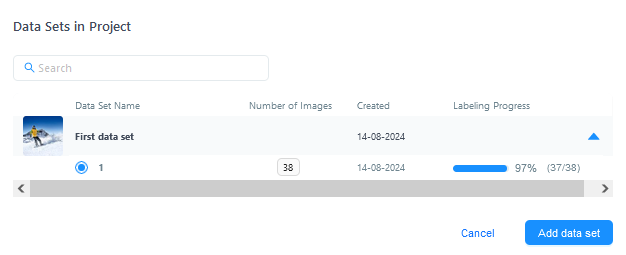
ペインの Project Assets ペインで、 Add data set to select the data set you want to use for the trial.
-
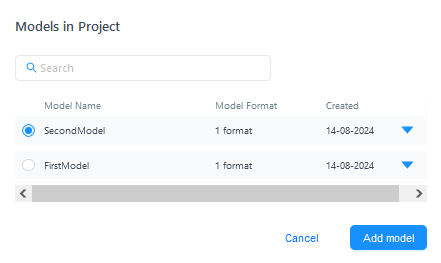
ペインの Project Assets ペインで、 Add model to select the model you want to use for the trial.
-
ペインの Project Assets ペインで、 Check mapping.
You should check the mapping and make any necessary changes. After you have created the trial, you can't change the project classes anymore.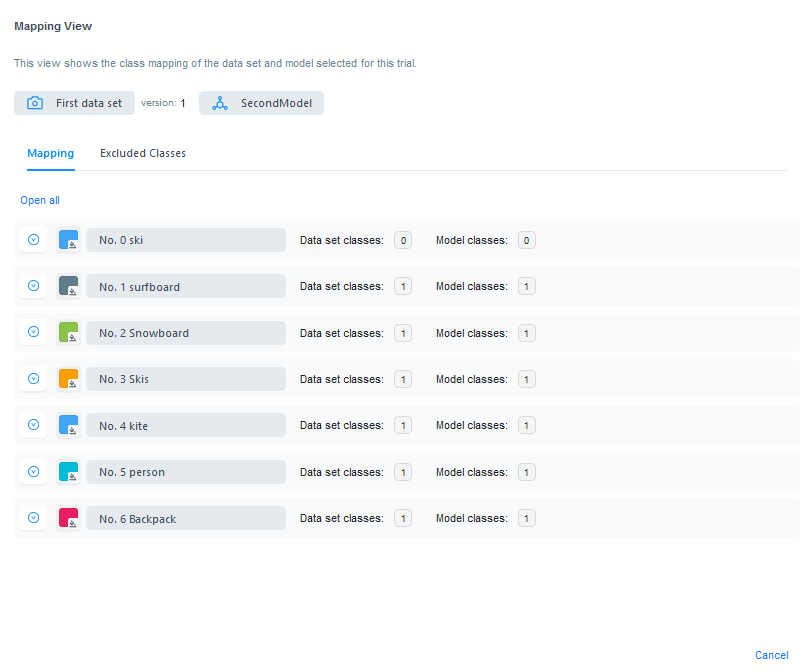
-
Click Create.
-
Click Add next trial run.
-
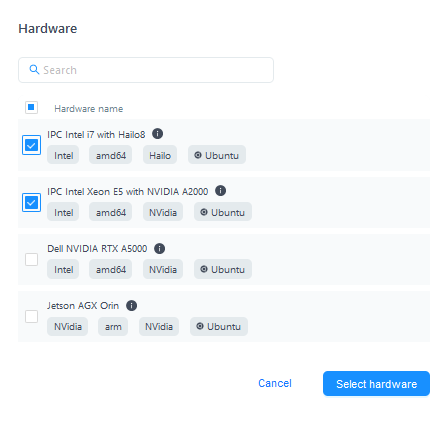
Select the hardware and model format.
-
クリック Run trial.
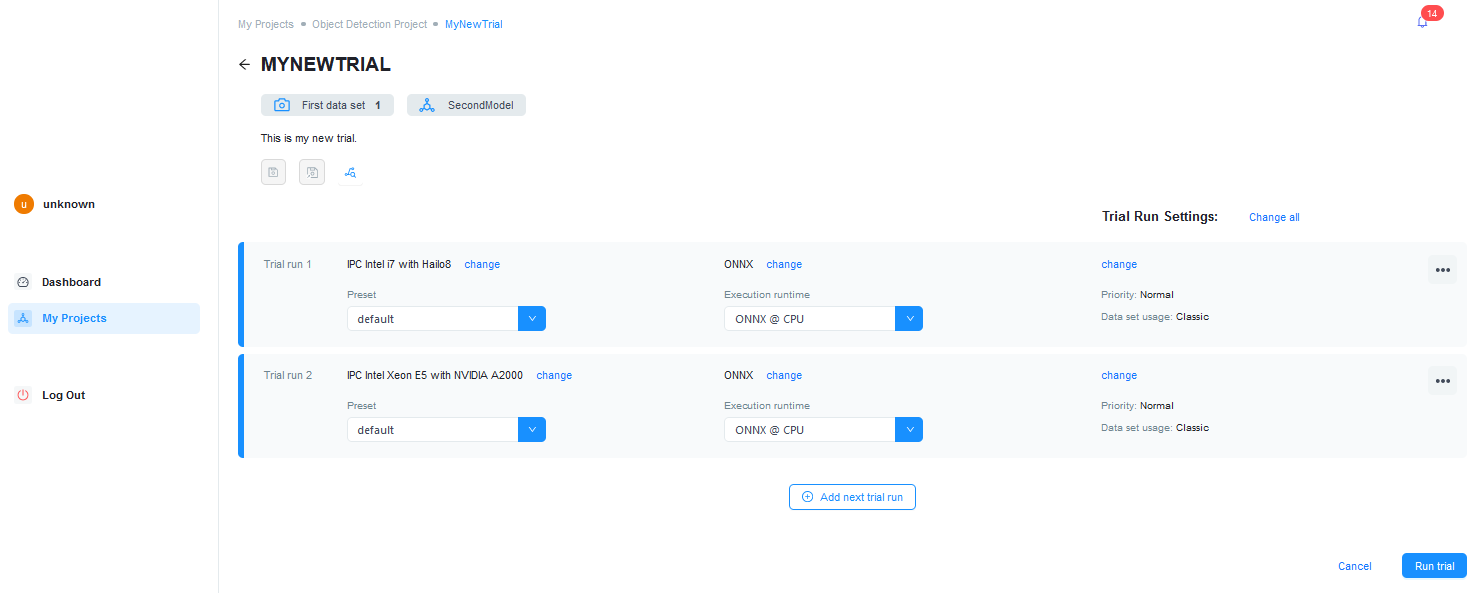
The trial run starts immediately. When the run has finished, the statistics are displayed on the trial page.
-
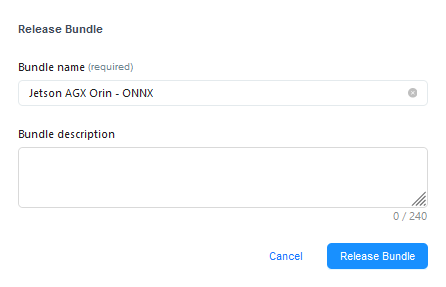
If you're happy with the results, you can release the bundle by clicking the Release bundle button next to the trial.

-
Change the name of the bundle and enter a description (optional).
-
Click Release bundle.
The bundle is being generated. -
Go back to the project overview page and click the Bundles tab.
After a short while, your bundle appears here.
Bundles#
After they have been released, bundles are displayed on the Bundles tab. Here, you can inspect a bundle's properties and also view details of the trial run that a bundle was generated from.
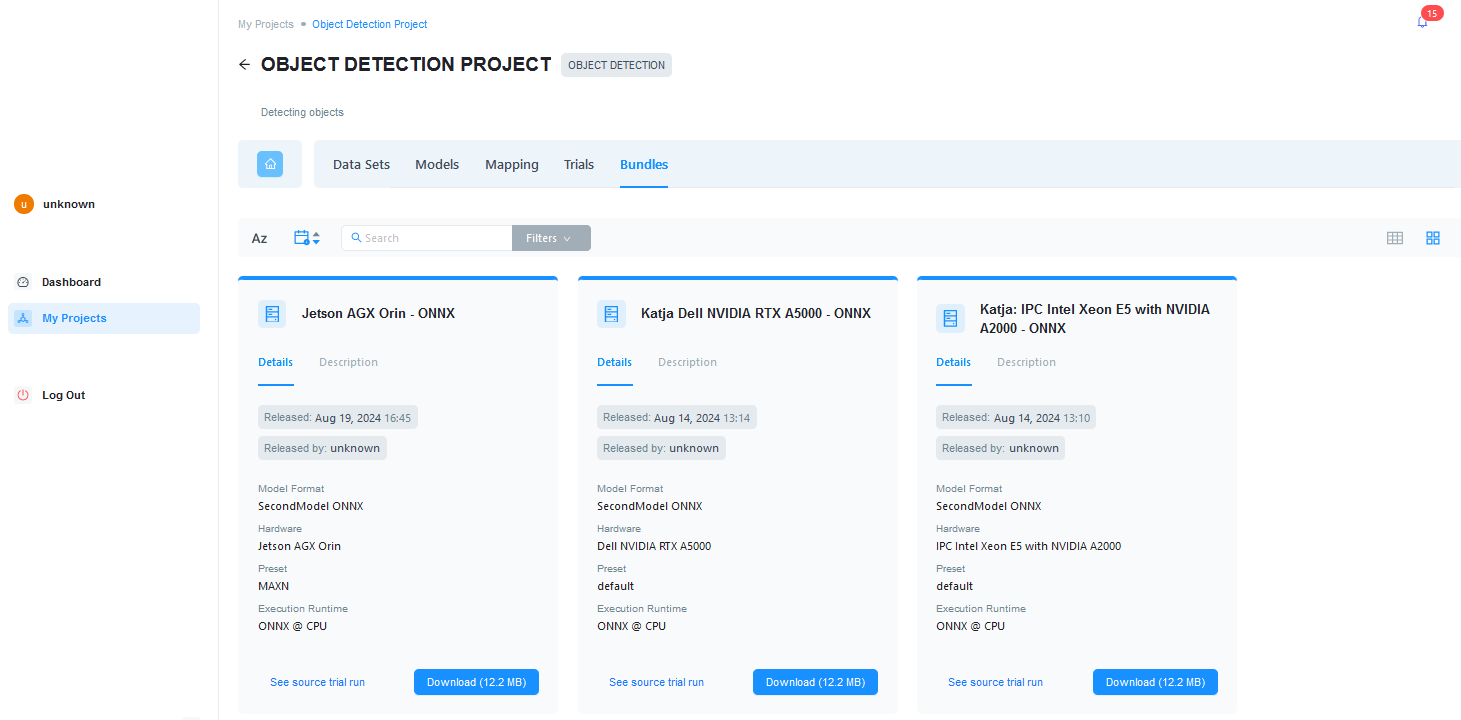
The bundle contains all necessary information, e.g., hardware configuration, model, etc., that a vTool needs to perform its vision task. It is now ready to be deployed to AI vTools using the pylon AI Agent.
You can also download a bundle to a local or remote storage location. In that case, users without access to the pylon AI Platform can still use the models in the bundles.
External Projects#
The pylon AI Platform allows you to connect to other platforms, e.g., Intel Geti and Landing AI. You can import projects created on those platforms and run trials with different hardware and models on them.
To establish a connection to another platform, you have to add the API key of that platform.
To add an API key:
- Log in to the pylon AI Platform.
- In the navigation tree on the left-hand side, click 設定.
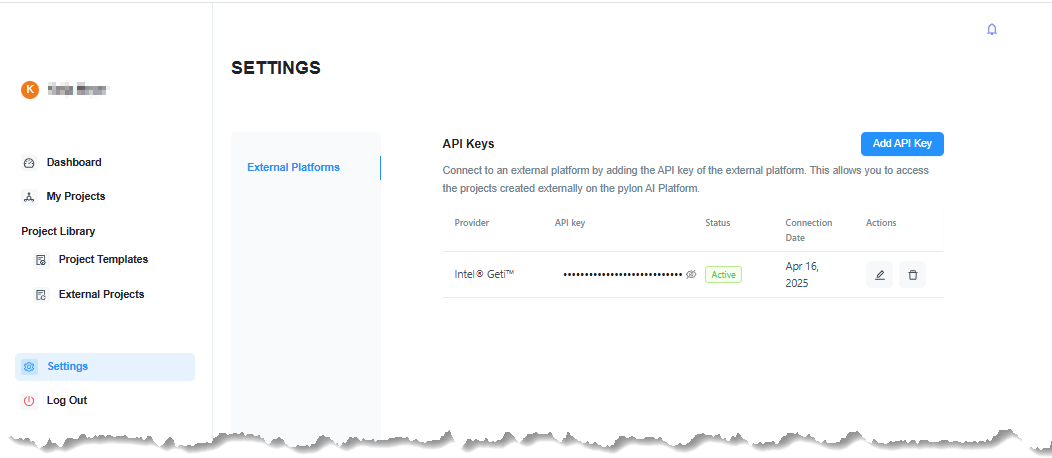
- ペインの 設定 view, click Add API Key.
イメージ Add API Key dialog opens.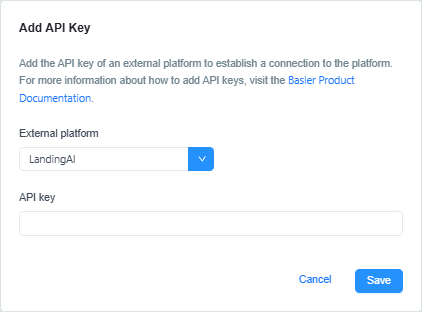
- In the Add API Key dialog, select the desired platform and enter the API key of that platform.
Instructions for obtaining the API key are available here:
Intel Geti
Landing AI - Click Save.
The API key you have added, appears on the API Keys page. Also, projects created on external platforms to which you have established a connection, are now available in the External Projects view.
Now, you can import external projects into your project library and test them. Note that external projects are read-only. You can't edit their resources, e.g., data sets, on the pylon AI Platform. If you want to make changes, you have to do that on the original platform.
To import external projects:
- In the navigation tree on the left-hand side, click External Projects.
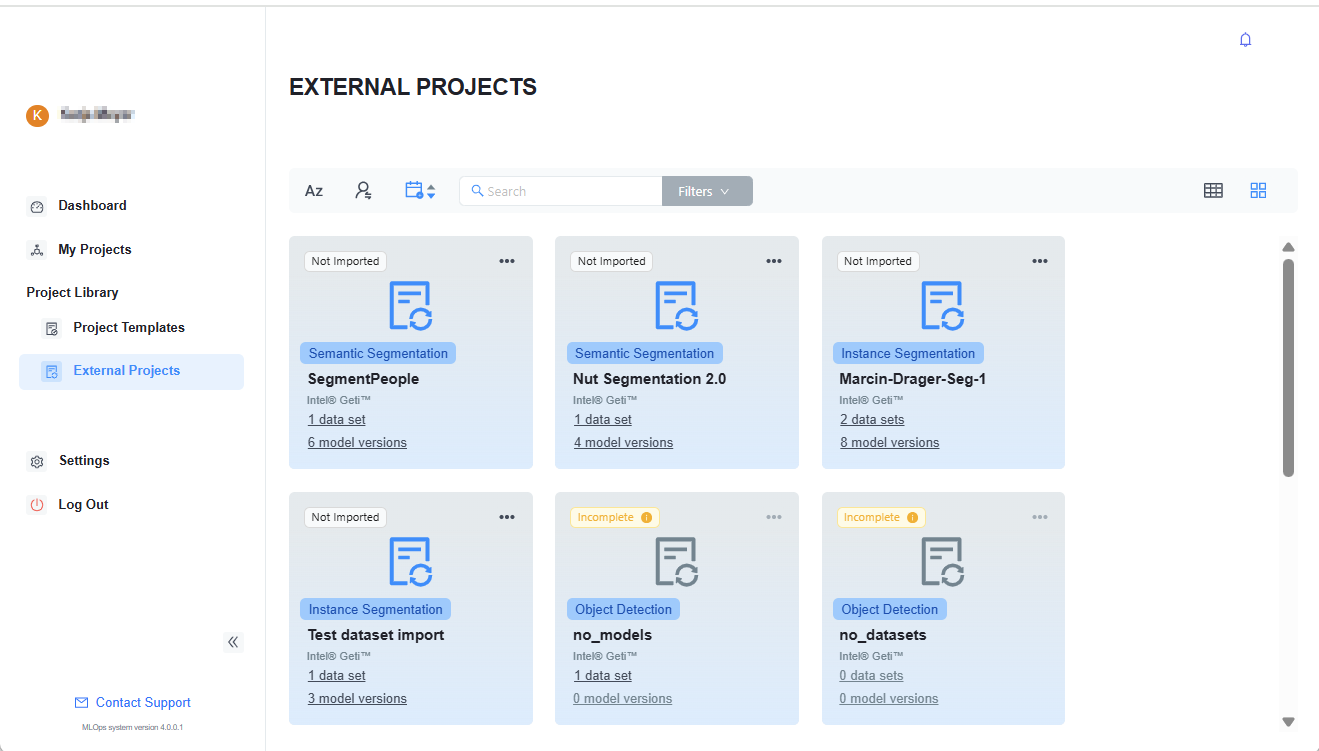
- Click the project that you want to import.
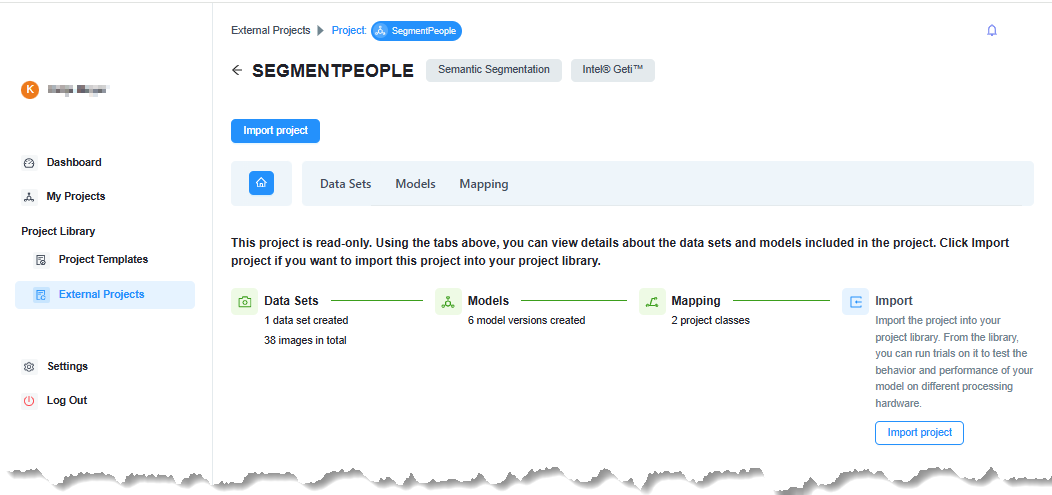
- Review the resources of the project on the Data Sets, Models, and Mapping tabs.
- If you're happy with the project, click Import project.
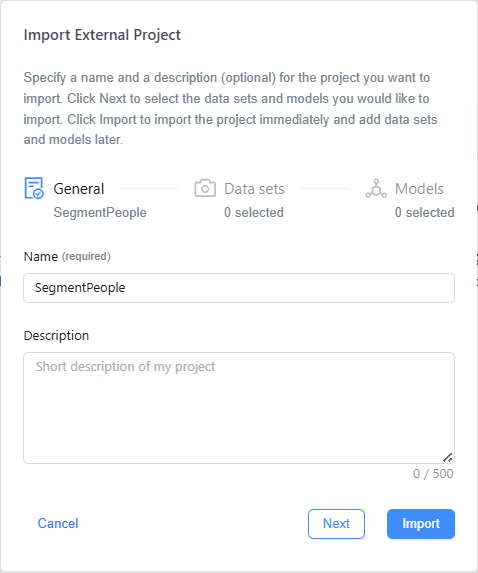
- Enter a name and a short description (optional).
- Nextをクリックします。
- Select the data set that you want to import.
You can also do this at a later stage. You can only import data sets that are part of the external project. - Nextをクリックします。
- Select the model that you want to import.
You can also do this at a later stage. You can only import models that are part of the external project. - Click Import.
The project is imported and added to your project library. - In the navigation tree on the left-hand side, click My Projects.
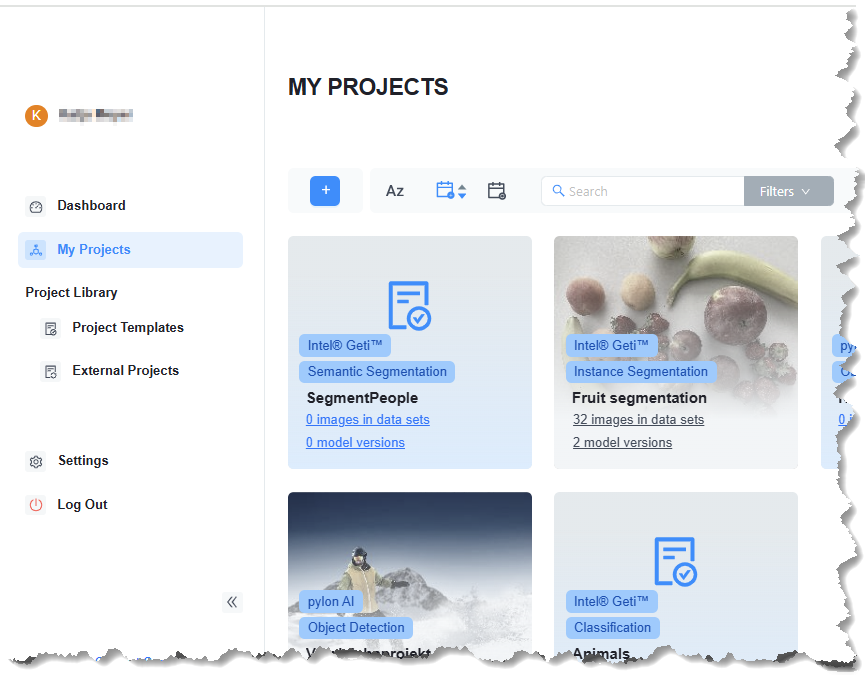
The project you have just added is now available. - Click the project to edit it, e.g., add data sets and models, if you haven't done so already, and view the mapping.
- Run trials and create bundles.