Static Defect Pixel Correction(pylon Viewer)#
This feature is available for ace 2, boost R, and dart M cameras.
仕組み#
この機能には、Defect Pixel Correction機能用グラフィカルユーザーインターフェース(GUI)があります。
ここで、画素欠陥補正モードを選択し、画素欠陥補正をカスタマイズできます。
画素欠陥補正は、リストに画素欠陥の座標を入力し、そのリストをカメラに保存することでカスタマイズできます。カメラは、画像取得中にこれらの画素を自動的に補正します。
情報
pylon API(BslStaticDefectPixelCorrectionModeパラメーター)で使用できる補正モードに加えて、GUIバージョンにはUser incl. Factory補正モードがあります。このモードはGUIでのみ使用でき、工場補正とユーザー補正を組み合わせています。詳細については、以下を参照してください。
Defect Pixel Correctionの実行#
- 現在有効になっている場合は、連続画像取得を停止します。
- [カメラ]>[Static Defect Pixel Correction]をクリックします。
-
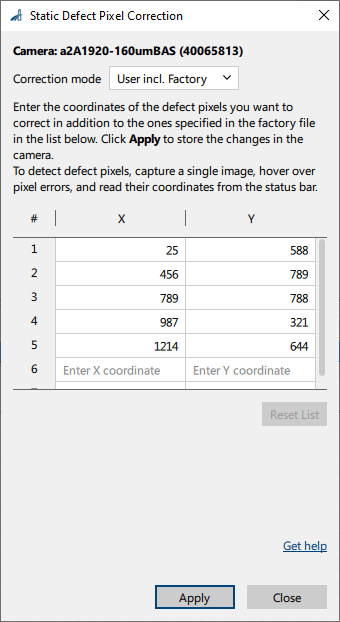
[Correction Mode]ドロップダウンリストで、目的の画素欠陥補正モードを選択します。
- Factory:工場ファイルに座標が保存されている画素欠陥のみが補正されます。工場ファイルはカメラの製造時に生成され、変更できません。
- User incl. Factory:工場補正(上記参照)に加えて、カスタム画素欠陥座標を指定できます。
- Off:カメラは静的画素欠陥補正を実行しません。
-
[User incl. Factory]を選択した場合:
- Single Shot機能を使用して1つの画像を撮影します。
- 画像を拡大し、画素エラーを検索します。
-
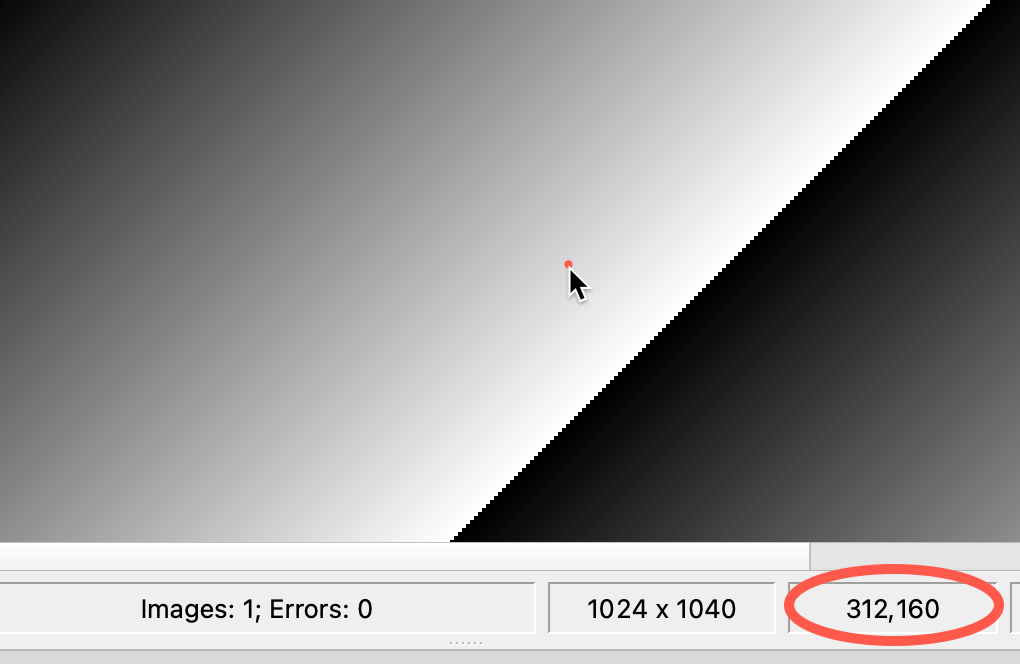
画素エラーが見つかった場合は、その上にカーソルを置き、ステータスバーから座標を読み取ります。

-
[Static Defect Pixel Correction]ダイアログのリストにx座標とy座標を入力します。

情報
If the
OffsetXor theOffsetYparameter or both are set to a value greater than 0, you must add the offset values to the coordinates shown in the pylon Viewer. -
表示されているすべての画素エラーについて、上記の手順を繰り返します。
-
[Apply]をクリックして設定をカメラのメモリーに保存します。